Rule Engine Tab
Instead of uploading the separate leads in separate campaigns, you can upload the leads centrally in Ameyo and use this "Rule Engine" Configuration to automate what leads shold go to which campaign.

Figure: Rule Engine Tab
Create a Rule
Perform the following steps to create a rule.
- Click "Add" to create a new rule using the following pop-up.
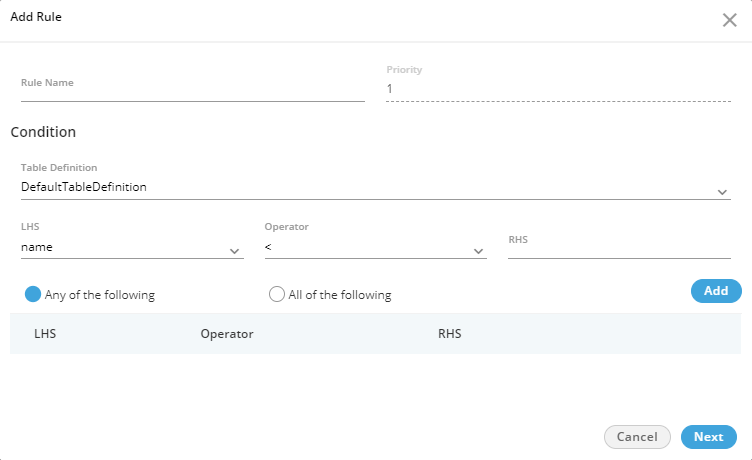
Figure: Pop-up to add a box
- Provide a name for the new rule.
- Select the default or another custom table definition.
- In LHS (Left Hand Side) drop-down menu, you have to select any of the following options.
- timezone
- phone2
- name
- phone3
- phone4
- phone5
- phone1
- After selecting an option in LHS, you have to select any of the following oeprators in "Operator" drop-down menu.
- <
- =
- !=
- >
- Now, provide a value in "RHS" text field.
- Click "Add" to add this filter. The added filter will be listed as a row in the textarea.
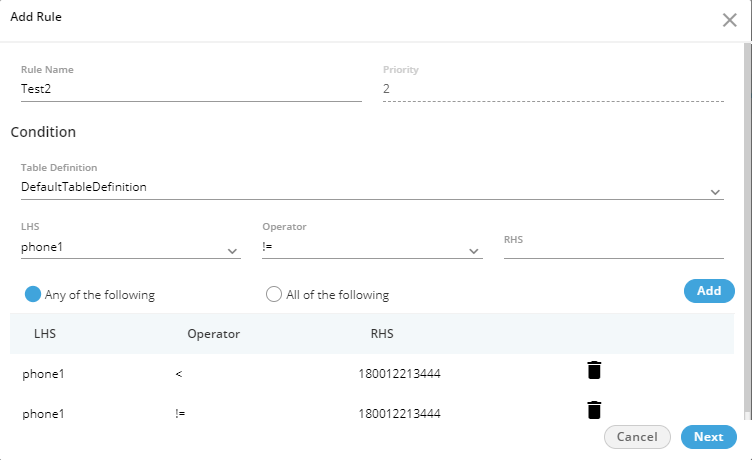
Figure: Sample Details to add a Rule
As per above screenshot, the leads having number less than 180012213444 and not equal to 180012213444 will be filtered for a campaign.
You can add multiple filters using these steps. - You can select any of the followiong option to specify the applicability of the multiple filters.
- Any of the following: Any of the listed filters should be matched.
- All of the following: All listed filters should be matched.
- Click "Next" to proceed. It shows the following pop-up.

Figure: Adding Atomic Rule
- You have to select any of the following rule type here.
- New: Select it to create a new rule for the selected campaign.
- Update and Migrate: Select it to update the existing rule and migrate these new conditions to it.
- Update: Select it to update the existing rule in the selected campaign.
- Select the campaign for which you want to create the rule.
- In "Lead" drop-down menu, you have to select the lead upon which the rule will be applied.
- Click "Finish" to create the rule.You can create multiple rules for same or different campaigns to filter the same or different leads using these steps.

Figure: Added Multiple Rules
Priortize the Rules
The rules are executed in sequential order from top to bottom. Perform the following steps to manage the prioritization of multiple rules.
- Select a rule.
- Click "Move Up" to move the rule up. Now, this rule will be executed before other rules located below.
- Click "Move Down" to move the rule down. Now, this rule will be executed only after the execution of rules located above.
Edit a Rule
Perform the following steps to edit a rule.
- Select a rule and click "Edit" button. It shows the following pop-up.
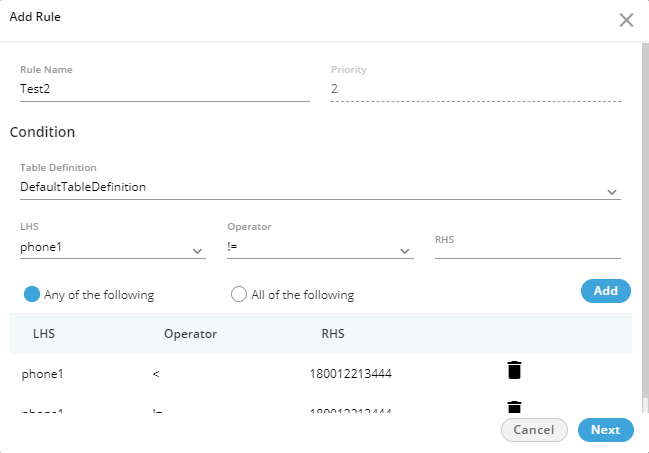
Figure: Edit a Rule
- You can make the following changes here.
- Rule Name
- Table Definition
- LHS
- Operator
- RHS
- Click "Next" to proceed.
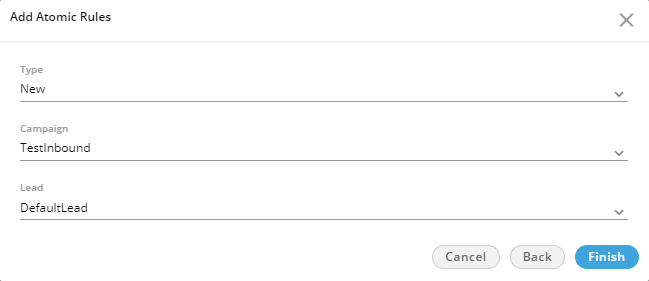
Figure: Edit a Rule
- Here, you can make the following changes.
- Rule Type
- Campaign
- Lead
- Click "Finish" to save the changes.
Rather you can click "Cancel" to discard the changes.
You can click "Back" to go back to the previous pop-up of editing the rule.
Delete a Rule
The Deleted Rule cannot be retrieved back. Also, the deleted rule will not be applicable on the selected campaign.
Perform the following steps to delete a rule.
- Select a rule and click "Delete". The following warning message is displayed on the screen.

Figure: Delete a Rule
- Click "Yes" to delete the rule.
Rather, you can click "No" to not delete the rule.